They say you don't know how much you're going to miss someone (or in this case something) until they're gone. This definitely does not apply to our kitchen floor for the past 4 years. A twist on that thought...I didn't realize how ugly it was until it was gone. I was blind to it...or maybe I just chose to look the other way...or not look at it at all! In all honesty, I treated it as low to no maintenance. In other words, it got NO attention from me. Our little pooch, Annie, patrolled the kitchen floor 3 times a day and kept it clean in her own doggy, kind of gross, licky way. Because of this, the 3 second rule at our house was at your own risk...and if you didn't know this about our floor, then what you didn't know wouldn't kill you!
Here are a few before photos...


Here are a few before photos...

Notice the repaired gaping crevice in the upper left corner. I really was blind to it's ugliness. The other thing that drove me crazy was the unpainted wainscoting on the cabinet (lower right) that I've meant to paint for 10? years. Why wait sooo long?! Part of our indecisiveness on the floor was the cost of whatever would replace it. I was thinking of some kind of laminate, but in the end we decided to paint it. It was the most economical choice. I started doing some research on painting cement floors. I couldn't find anything that really spoke to me that was also within my skill set. Browsing Pinterest, I ran across this:
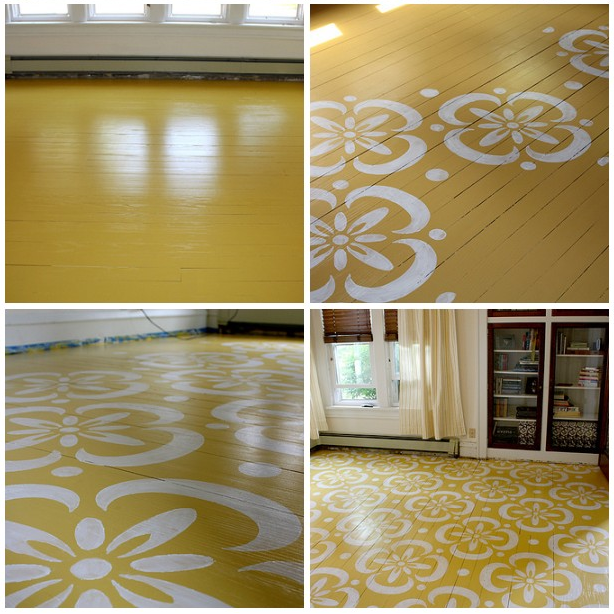
Photo: Courtesy of Restless Oasis via Design Sponge
And this:

Photo: Courtesy of Lori via Paisley Wallpaper
They both looked cool, but...involved. We decided to just go with paint and get it done.
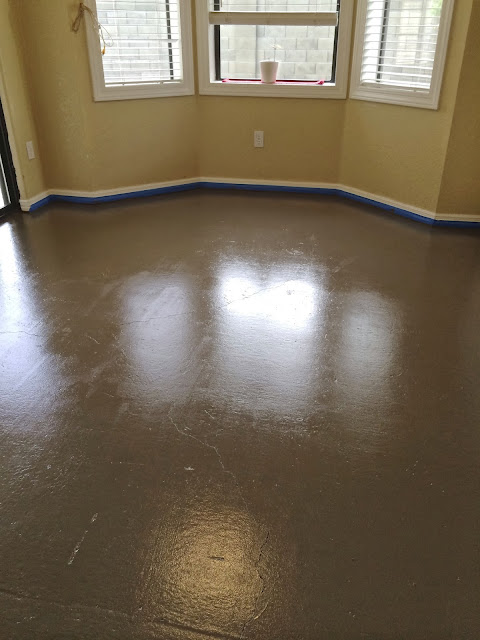
I prepped the floor by filling nail holes and the jumbo crack running right through the middle of the floor, then scraping what I could, sweeping and finally washing with TSP.
We initially did the wrong color and I tried to fix it by "antiquing it" with Antiquing Medium.

Second time's the charm. We found a darker color that seemed to work with our wall color and was exactly what I was looking for. After painting it, I just wanted to be DONE, so we put a glossy clear coat on it in hopes of moving our kitchen table back in. After looking at our glossy, painted floor, it looked like, well...a glossy, painted cement floor with flaws a plenty!

Brian again suggested stenciling. O....k....it can't be worse...and if it is, then we can always paint over it again.
Paisley Wallpaper's design won out. She generously provided a stencil pattern on her blog, which we printed and used to create our own stencil. (We actually ended up making about 4 of them in poster board. It was easier to work with than the foam core Paisley Wallpaper suggested. Our kitchen also has some non symmetrical dimensions which required some half blocks.)
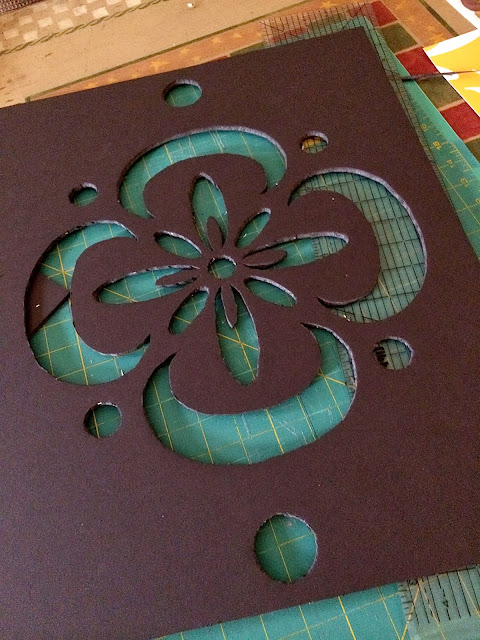 |
| Our lovely first stencil, which we used to trace subsequent stencils. |
 |
Yay! One block! (And it only took me 2 minutes!)
|
I used the table area to find a center starting point and put down the first block. This was going to take a while. And it did. 172 blocks in all, not counting partials to fill in smaller spaces. In the end, it was totally worth it. However, after stenciling everything, I thought the stark contrast of dark to white didn't really go with our imperfect, bumpy, cracked concrete floor, so I did what I usually do...sanded it! It instantly felt better. I am just that kind of girl. It just feels cozier to me. It's going to get worn anyways. Now I won't care when it does. It's halfway there already!
 |
| Making progress. |
 |
| Brian gets major kudos for encouraging me with this idea AND doing a majority of the work! Annie dog gets credit for nothing! All she did was walk all over it. Thankfully, flat paint dries fast! |
 |
| 15 minutes with my rotary sander...so much better!! |
 |
| Can we be done?!? Ready?? "M.O.V.E. that Emma!" Ta-dah! |
 |
| Hello fun floor! Where have you been the last 4 years?! If you have any questions about this process or need encouragement, leave me a message. You can do it! :-) |